Oh how I just love this precious book! I always have since I was a little child, myself! I always found the art so interesting and happy. I especially found it dreamy as a girl from South Carolina who is lucky to see one good one inch snow a year. I was so happy to see it on this curriculum and had my own childhood copy for my daughter to use!
Here's what we got into:
Bible Verse for the week: Psalm 90:12 - "Teach us to number our days, that we may gain a heart of wisdom."
Well, we started this one off with a big white powdery bang....in my kitchen....We laid down our camping tarp in the kitchen moving the table and chairs to the wall to make more space. Then...I did what no Type A person like myself but mother like myself who loves to teach and play would do....I dumped an entire bag and a half of white flour onto the tarp. Yes...I knew the soft powder would fly and float about but...childhood is fleeting and God gave us vacuums, mops, and brooms for a good reason! I called Ellie in to see the surprise and told her, "Happy Snow Day!! Jump in!!" She didn't even hesitate! She immediately began mimicking Peter's actions in the story of making snow angels, snowballs, making tracks, and making a snowman. She even made some of her "snow" plop on her head the same as he. Again, being type A, I was like twitching on the inside but I am a huge believer in the Wild and Free mantra and also making memories with my child and using playfulness as a time to learn. So, what I did next, I took a deep breath then sat myself in the snow. I rolled around in it with her, threw snow balls with her, played creative imaginative games like "mama and baby polar bear," we danced in the snow, and I let her pour it on my head over and over. My husband was home this day and he stood by observing with one heck of a face but laughing. He joined in as well! We practiced tracing some letters in the snow, making footprints and foot tracks, making shapes, drawing pictures, and building snow castles. This went on forever and ever and finally I had to draw it to a close after so very long. She was so joyous with this activity she actually said aloud to us while playing, "I'm having a great day! Thank y'all for my snow day!" And that just makes the mess and hard cleaning work after worth it. We showered and scrubbed really well then moved on to some other snowy fun!
Supplies
1. One gallon sized zip lock bag
2. One sandwich sized zip lock bag
3. 1/2 cup whole milk
4. 1.5 Tbsp sugar
5. 1/2 tsp vanilla extract
6. About 24 ice cubes
7. 6 Tbsp salt
Instructions
1. Pour milk and sugar in the Large bag
2. Add the vanilla extract
3. In the small bag, add the ice and salt and seal
4. Place the small bag inside the large bag
5. Shake bag continuously for 10 minutes. (I let Ellie do what she could...which wasn't much. Consider this your arm workout of the day, mamas.)
6. Then, serve the ice cream, which is enough for one person by the way, in a bowl and add any desired toppings. (Ellie liked it plain!)
Ellie took an arctic bath! She had a blue bath bomb, bubble bath, and polar bears, orcas, and penguins in her tub and she had a blast! We discussed the animals and blubber and what blubber is and how it keeps the animals that live in the intense cold climates warm.
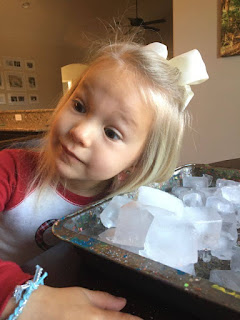
After her bath, I showed her how blubber works by filling a bucket with ice and having her stick one hand into the ice as long as she could stand. She thought this was hilarious and silly and she didn't last long but she kept wanting to try! Then, I pulled out the Crisco we use once a year at Christmas for sinful Chocolate chip cookies to coat her other hand. The Crisco is pure lard. This acts as Ellie's blubber in the icy environment. This was silly. She was slightly warmer and able to notice the difference but then all she wanted to do was flick it and lick it and the dog caught some mid air and it got really crazy up in there but it was still a lesson she understood and had fun with. There are other ways to do this too with coating a hand in Crisco and placing it in a zip lock bag first. It's really fun! And super good science and sensory development!
We also used the snowy climate and winter weather to study hibernation. We have been studying hibernation for about a month now but we continued that as part of our study with the book. We built a bear cave in our living room where Ellie and her daddy crawled in to hibernate! Ellie packed some things to make her accommodations satisfactory to her whims and desires. Pillows, blankets, stuffed animals, baby dolls, a flashlight, cup of water, and books later, she was all settled inside her bear cave for a long winter's nap with daddy. The two of them snuggled inside there reading books by flashlight and pretending it was cold if they peeked outside! We also made a bear hibernation snack with graham crackers, teddy grahams, and white icing (snow). I had envisioned a more enclosed structure but part of my job as her mommy teacher is to let her create and explore. Her bear den had walls and a floor. She made pillows and blankets for the bear family out of icing. She gave them beds and designed rooms within her house with her little imagination. She also enjoyed licking her hands clean of any "snow" they happened into. On the hibernation note, she has found it so interesting as again we are just continuing that study, that this week she made her own hibernation burrow outside a couple of times. She dug in our dirt and grass clippings telling me she was using the claws on her paws to dig a warm burrow of which she crawled into like a little animal and pretended to hibernate. Also, on a hike we took this week, we observed under a massive boulder in some sand and dirt what was likely a burrow and hibernation spot for some animal. Beside it, Ellie began digging herself a burrow and said she was going to hibernate with it.
We did a couple of other sensory/ creative play activities.
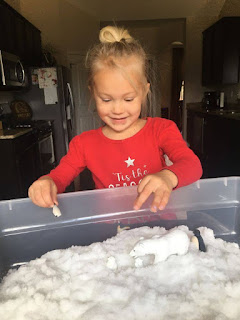
First, I ordered some instant snow from amazon. I poured the jar into one of her sensory buckets and added the appropriate amount of water. This stuff was a lot like if not what they stuff the inner linings of baby diapers with. 😂😂 It was super cool! It grew quickly before our eyes. Then, we added our little arctic animal figurines and oh wow! Days and hours spent making up her own stories and happenings between the animals, designing homes for them in the snow - cozy dens, friendships and alliances were formed between the penguins and polar bears and the baby animals sought independence by venturing into the great wild white hills all before calling for their mommies and daddies because an arctic fox was out to attack! Wow her brain is awesome! I just loved sitting and listening. She was in her own world. And when she asked, I joined in and interacted through my animal, too!
The other additional sensory bin idea we got into was pretty cool and very simple. We made our own morphable snow! Here is what you need: One roll of thick toilet paper...like Charmin quality, y'all. And two bars of white ivory soap, grated with a cheese grater. So in your sensory bin, first take the roll and completely unroll it and discard/recycle the center cardboard. Then, grate the soap bars on top of the toilet paper. Then gradually add water, I think I added 3 or 4 cups worth but add gradually so you don't over do it. Then, using your hands, mesh it together, ripping the toilet paper. You will get a great pliable dough like creation. Now invite your little one to come play!! We built a snowman (topped with a Reese's mini wrapper for a hat, and tiny twigs for arms). We made snowballs and squished it and enjoyed making different things with it together. You might even add glitter! When finished just dump it in the trash.
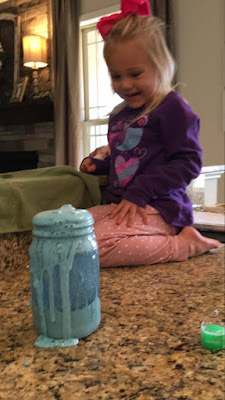
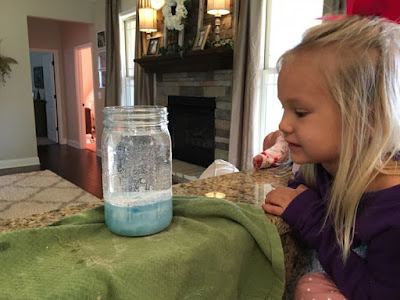
For more science, one day we made our own snow blizzard in a jar! A very fun, beautiful, and awesome, simple project. Here's what you need:
Supplies:
1. One quart sized clear glass mason jar
2. A small bottle of white acrylic paint (Wal-Mart fifty cents)
3. Blue food dye
4. Glitter
5. 1 cup of water
6. Alka-Seltzer
7. Stir stick (popsicle stick or skewer)
8. Baby oil (must be clear)
Instructions:
1. Begin by having your child squeeze the oil into the jar filling it about 3/4 full. (This is so great for hand strengthening and hand writing skills)
2. In a separate bowl, mix water and a few tablespoons worth of white paint with stir stick. Set aside.
3. Let your little add as much glitter and blue food dye as desired to the oil.
4. Now, add the water/paint mixture to the oil.
5. When ready, let your little add in one Alka-Seltzer and watch the reaction! After a few moments add one or two more, but be prepared for an overflow at this point.
The Science:
Oil is less dense than water. When you add the water to the oil, it instantly sinks to the bottom and the oil sits on top. When you add the Alka-Seltzer (citric acid) it reacts with the water causing pressure which rises upward into the oil, yet the oil pushes back forcing it back down. There is a back and forth pressure as the water pushes against the oil and the oil against the water causing bubbles and foam.
REALLY FUN!!
We made snowflake structures! Using large marshmallows and small marshmallows and skewers, we created snowflakes noting that each is a hexagonal shape with 6 points. Ellie also enjoyed just eating the marshmallows! 😂
We read a lot of really great go along books both fictional and non-fictional about snow. Here they are:


No comments:
Post a Comment